joepro.crv
Official Assignment Description: 'make something big'
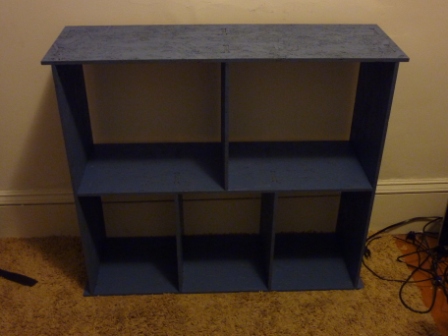
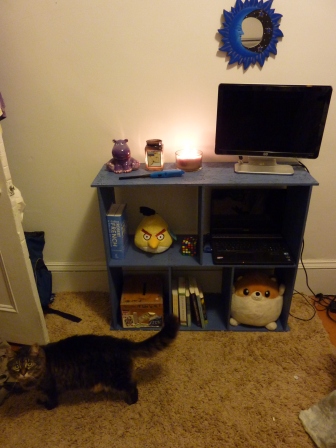
The purpose of this week's project is to design and build something big using computer-cutting techniques. As the resulting object was likely to end up in my house, I thought I might as well make it useful. My girlfriend wanted a bookshelf / tv stand, and that seemed like a reasonable project. My design and process were guided by the following goals:
Step 1: Create dimensioned drawings in Solidworks. I intended to make the design a function of three global variables: width, depth, and material thickness.
Starting values were: 38",12", and 0.41" (manufacture spec = 7/16"). It worked in general...but I made the mistake of cross-referencing dimensions. As a result, it is possible to
parametrically update the sketch, but it might not work as expected...so use the file below with caution.
Parts.SLDPRT
Step 2: Export sketch as .dxf file.
Parts_dxf.DXF
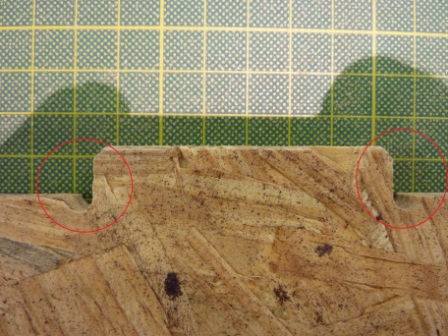
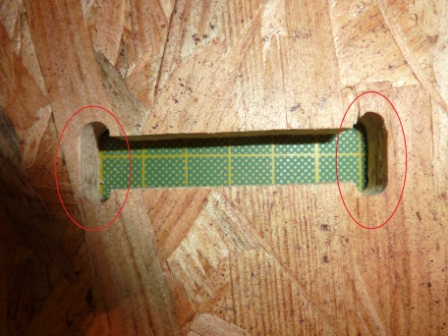
Step 3: Open .dxf in PartWorks2D, set material thickness, uncheck 'use origin offset,' edit and join necessary vectors, and Tbone fillet all concave
right angles to ensure joints fit together.
joepro.crv
Step 4: Create tool path file. Set start and cut depth, tool, offset, and mill type. I used 0", 0.55", 1/4" double-fluted end mill, 0.125", and conventional.
Check tool path in visual display. I created two files: the first one cuts a single piece (just to make sure everything is going ok), the second one does the
rest of my parts.
joepro1.sbp , joepro2.sbp
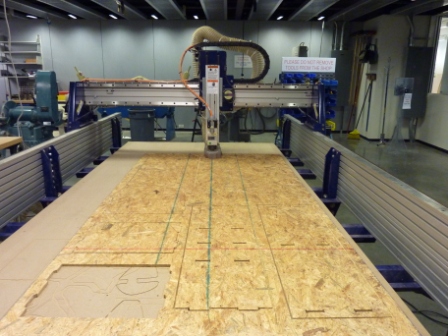
Step 5: Secure OSB to ShopBot bed with screws at each corner and side. Screws in the middle might be necessary if extra precision is desired.
Step 6: Open files in ShopBot3, turn on ShopBot, load and secure bit, zero X and Y, run Z-zero program at center of board, set spindle speed, start spindle,
start dust collector, and run path file(s).
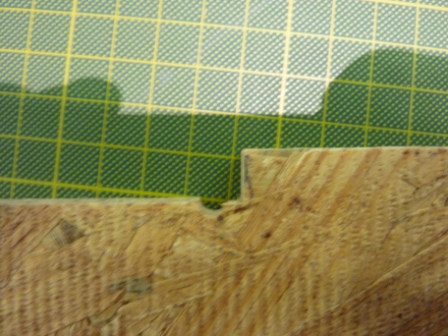
Step 7: Sand edges to remove sharp splinters and check press-fit joints. For some reason (I never tracked this problem down), four of the joints were slightly
misaligned (all others were ok). I used a reciprocating saw to trim joint edges so they would fit together.
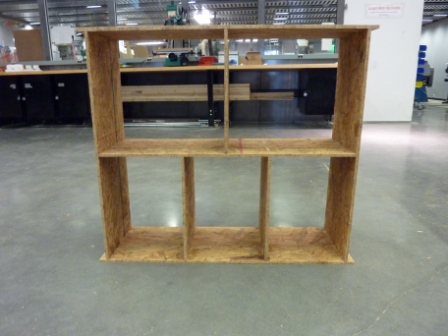
Step 8: Assemble, and decide it needs a finish.
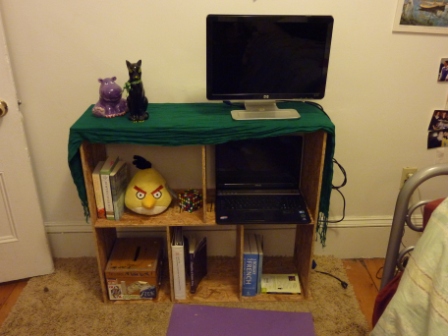
Step 9: Prime and paint. I used 3 cans primer and 3 cans paint.